Building a MySQL Database in Oracle Cloud Infrastructure (OCI) is easy. Within a few steps, you can build a MySQL instance for your development or production needs.
To begin building, you first have to login into your OCI tenancy. After you have logged in, use the “hamburger” menu (three lines in upper left corner) to open the navigation menu. From here, you’ll select “Databases”.
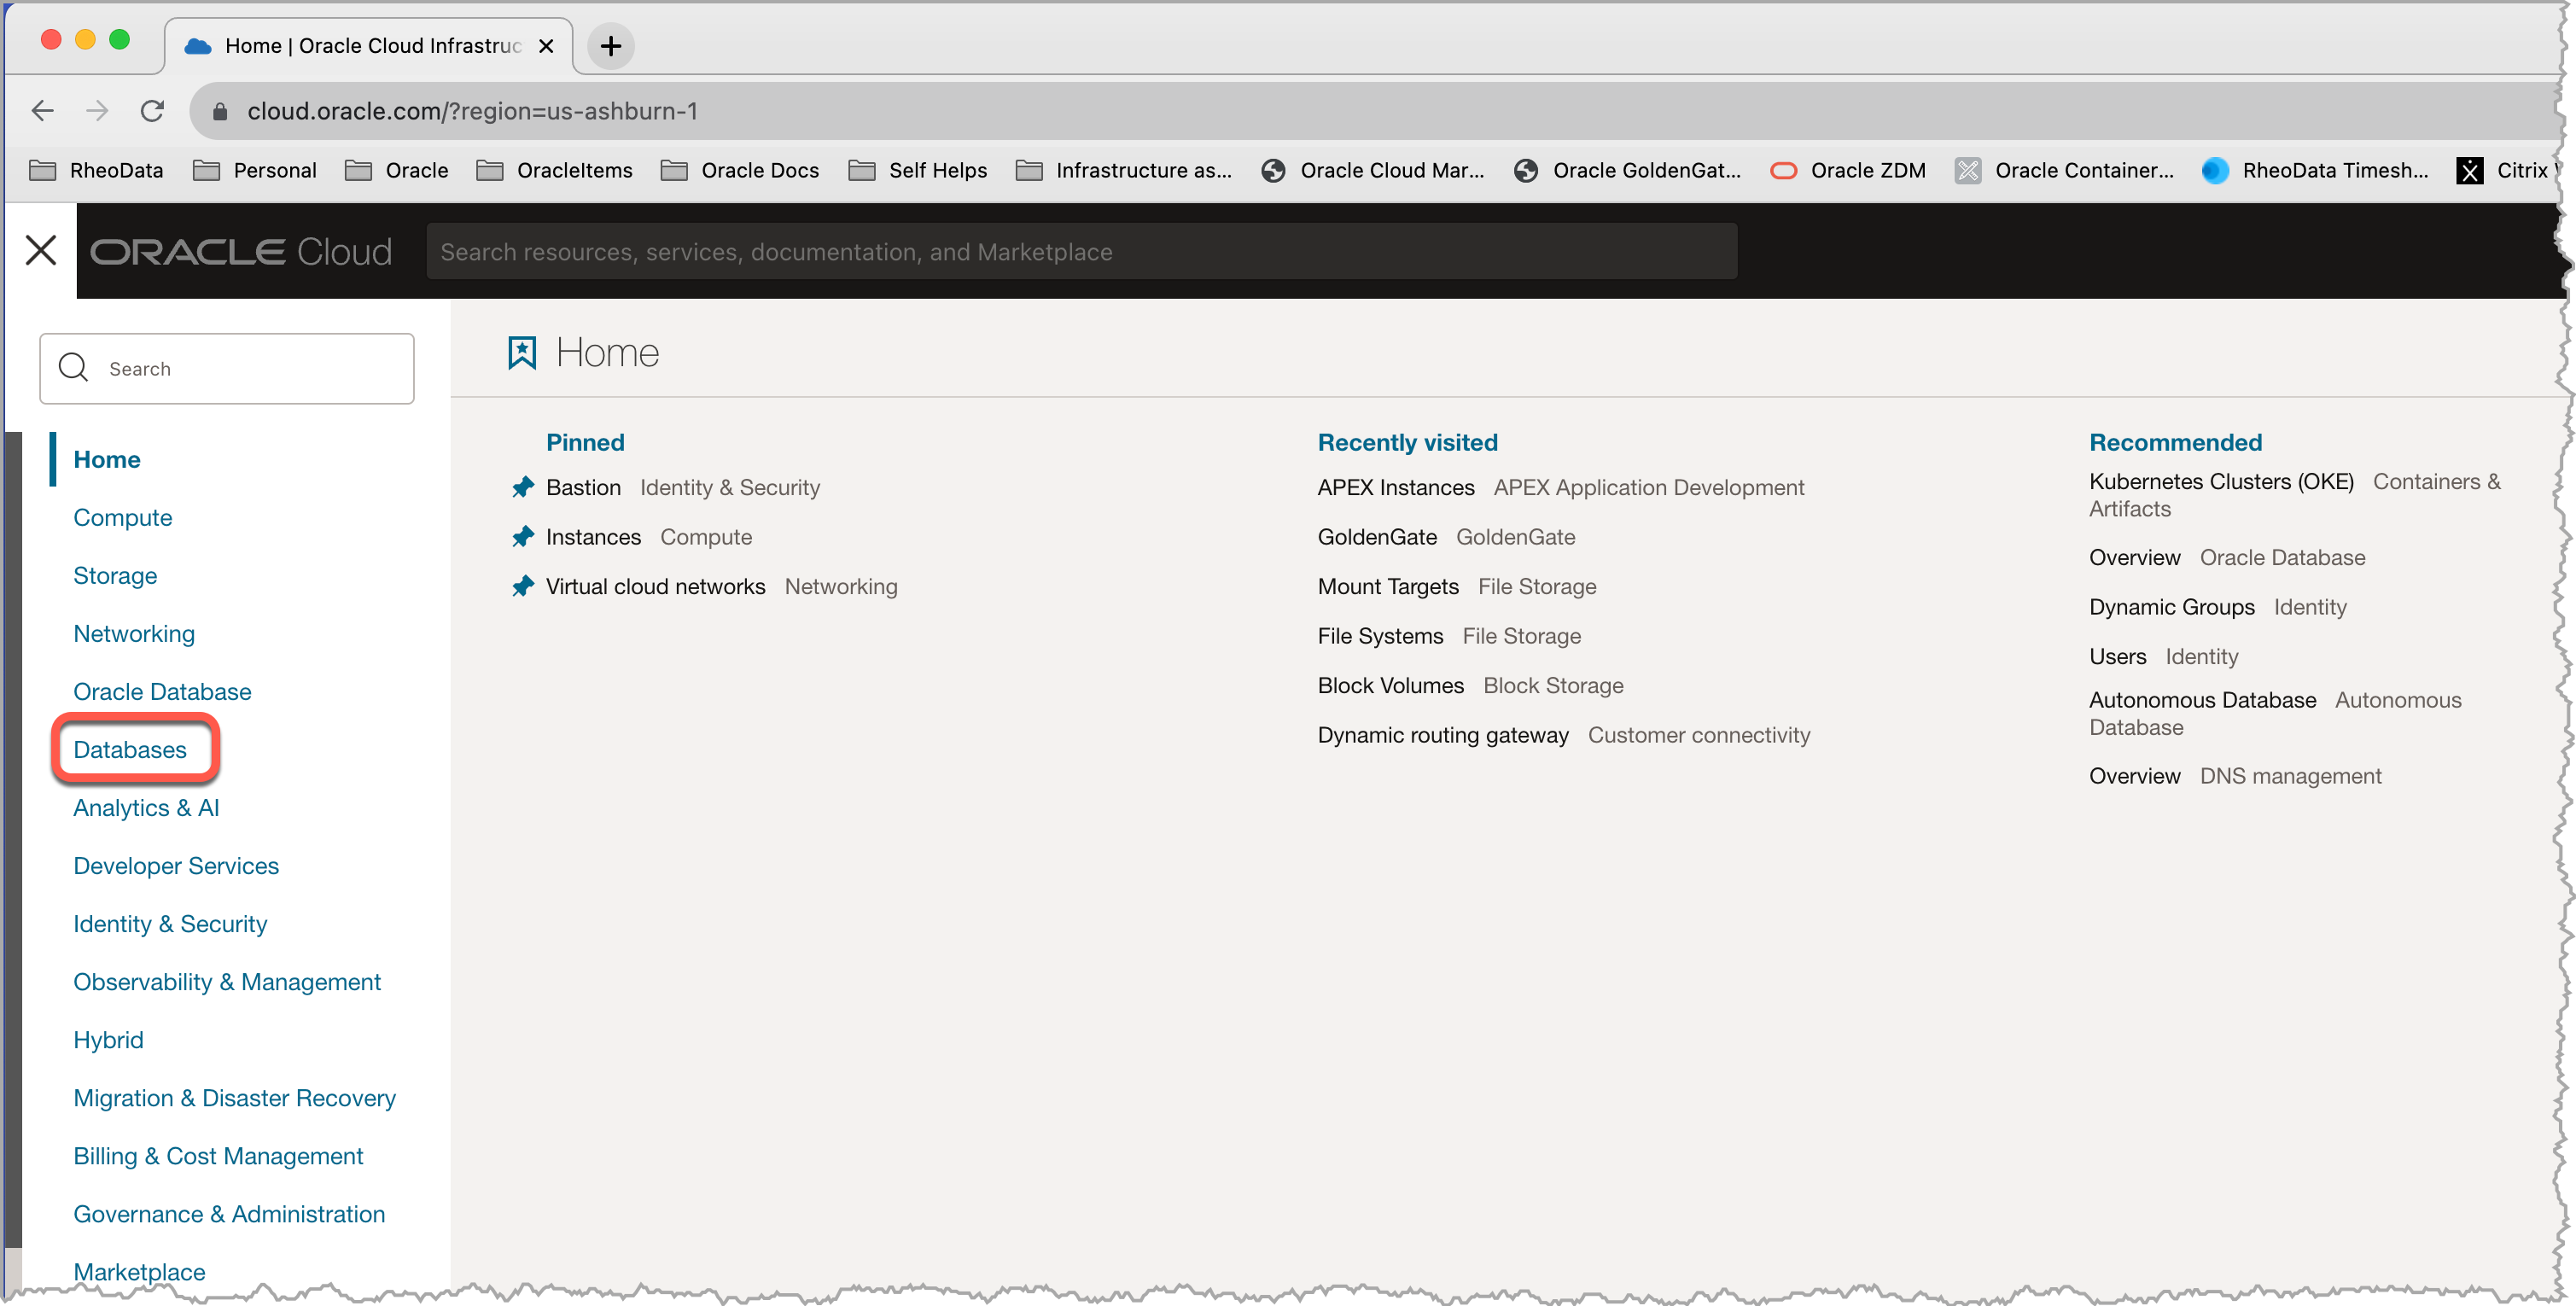
By selecting “Database”, the navigation menu will change and provide you with database options for MySQL Heatwave, MySQL Heatwave on AWS, NoSQL databases and Open Search. In order to build a MySQL Database Service (MDS) select “DB System” under MySQL Heatwave.
Note: Oracle has changed the MySQL Database Service (MDS) name to MySQL Heatwave. This was done to align more with marketing.
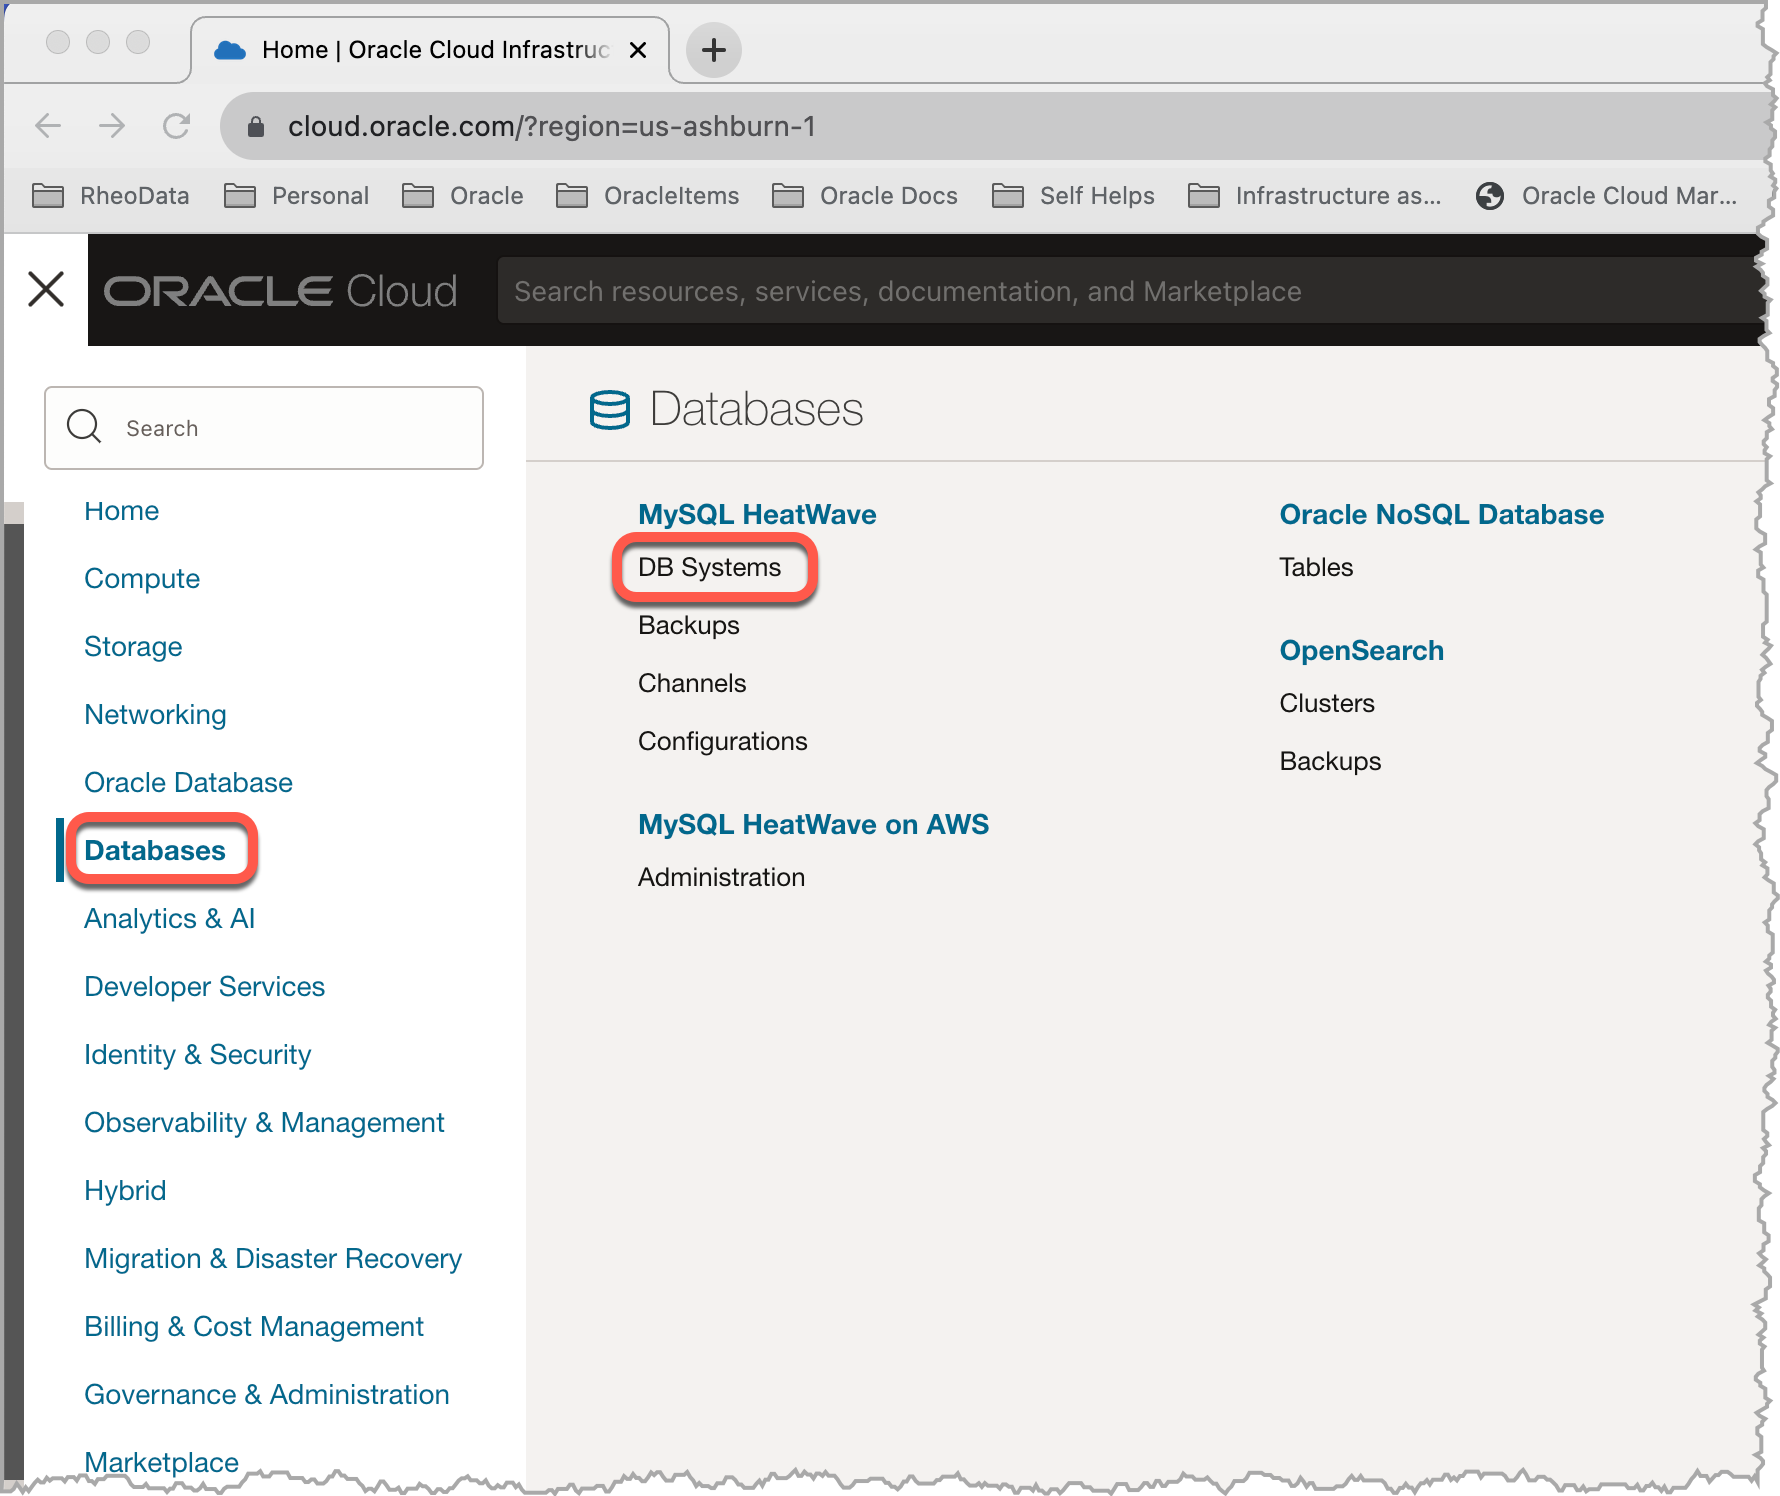
With selecting “DB Systems”, we are now taken to the MySQL Heatwave page. On this page, we will see a button called “Create DB System”.
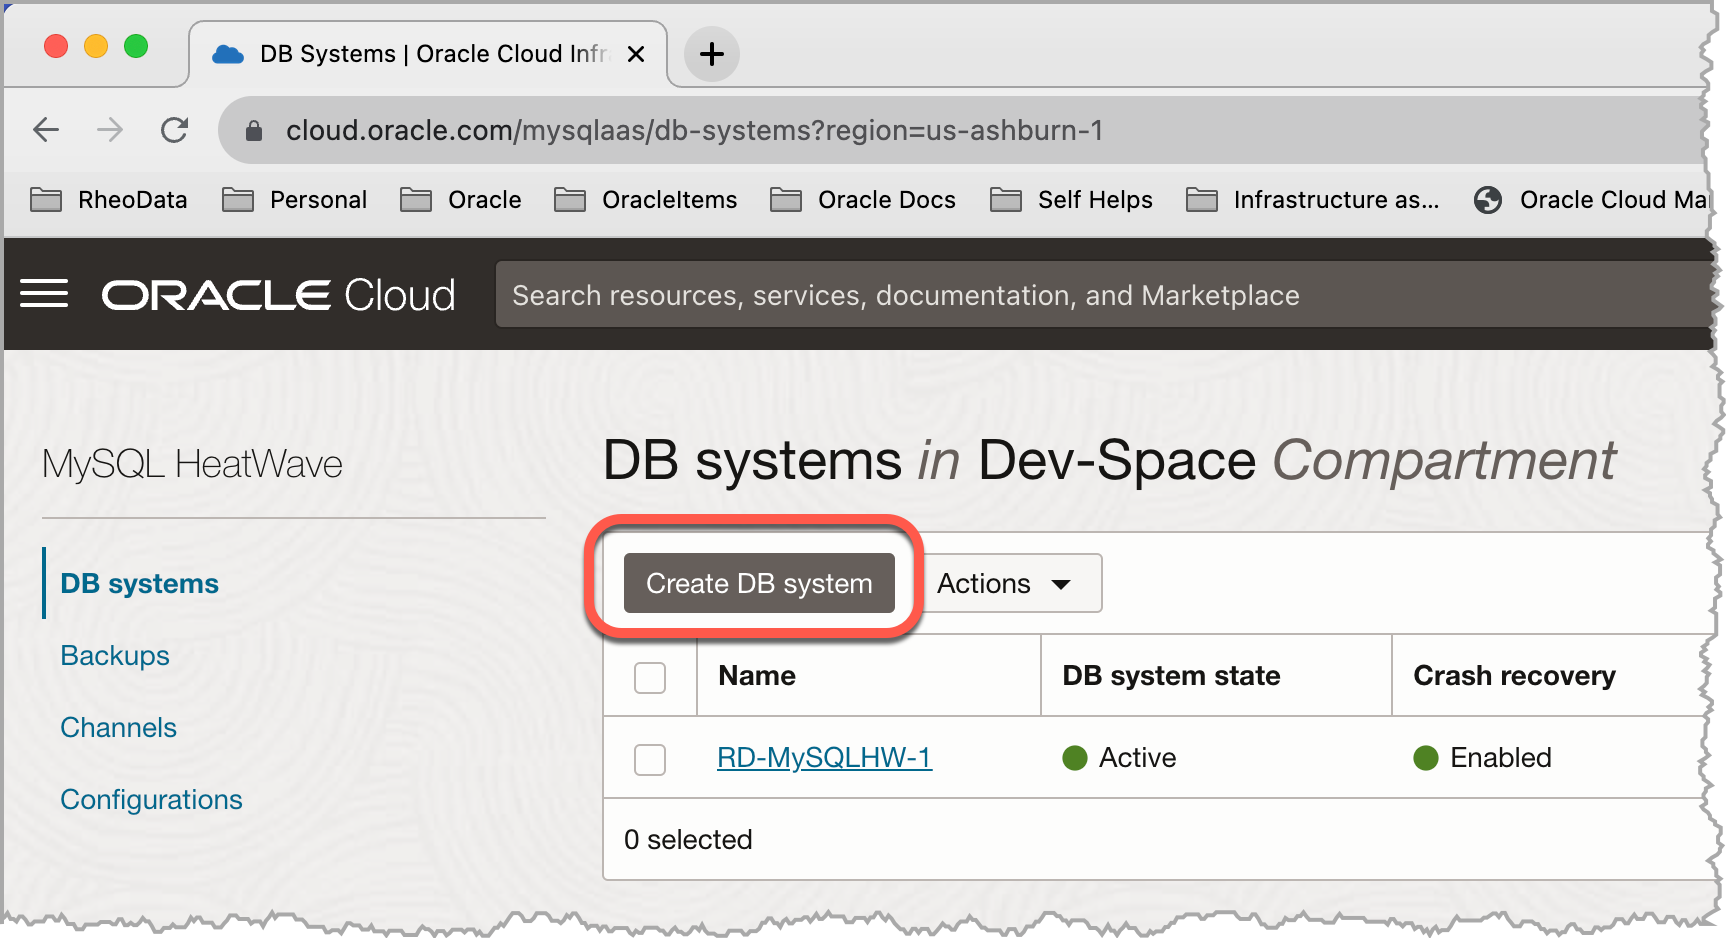 By clicking this button, we can begin the process to build our MySQL Database and the page changes to the “Create Database System” page.
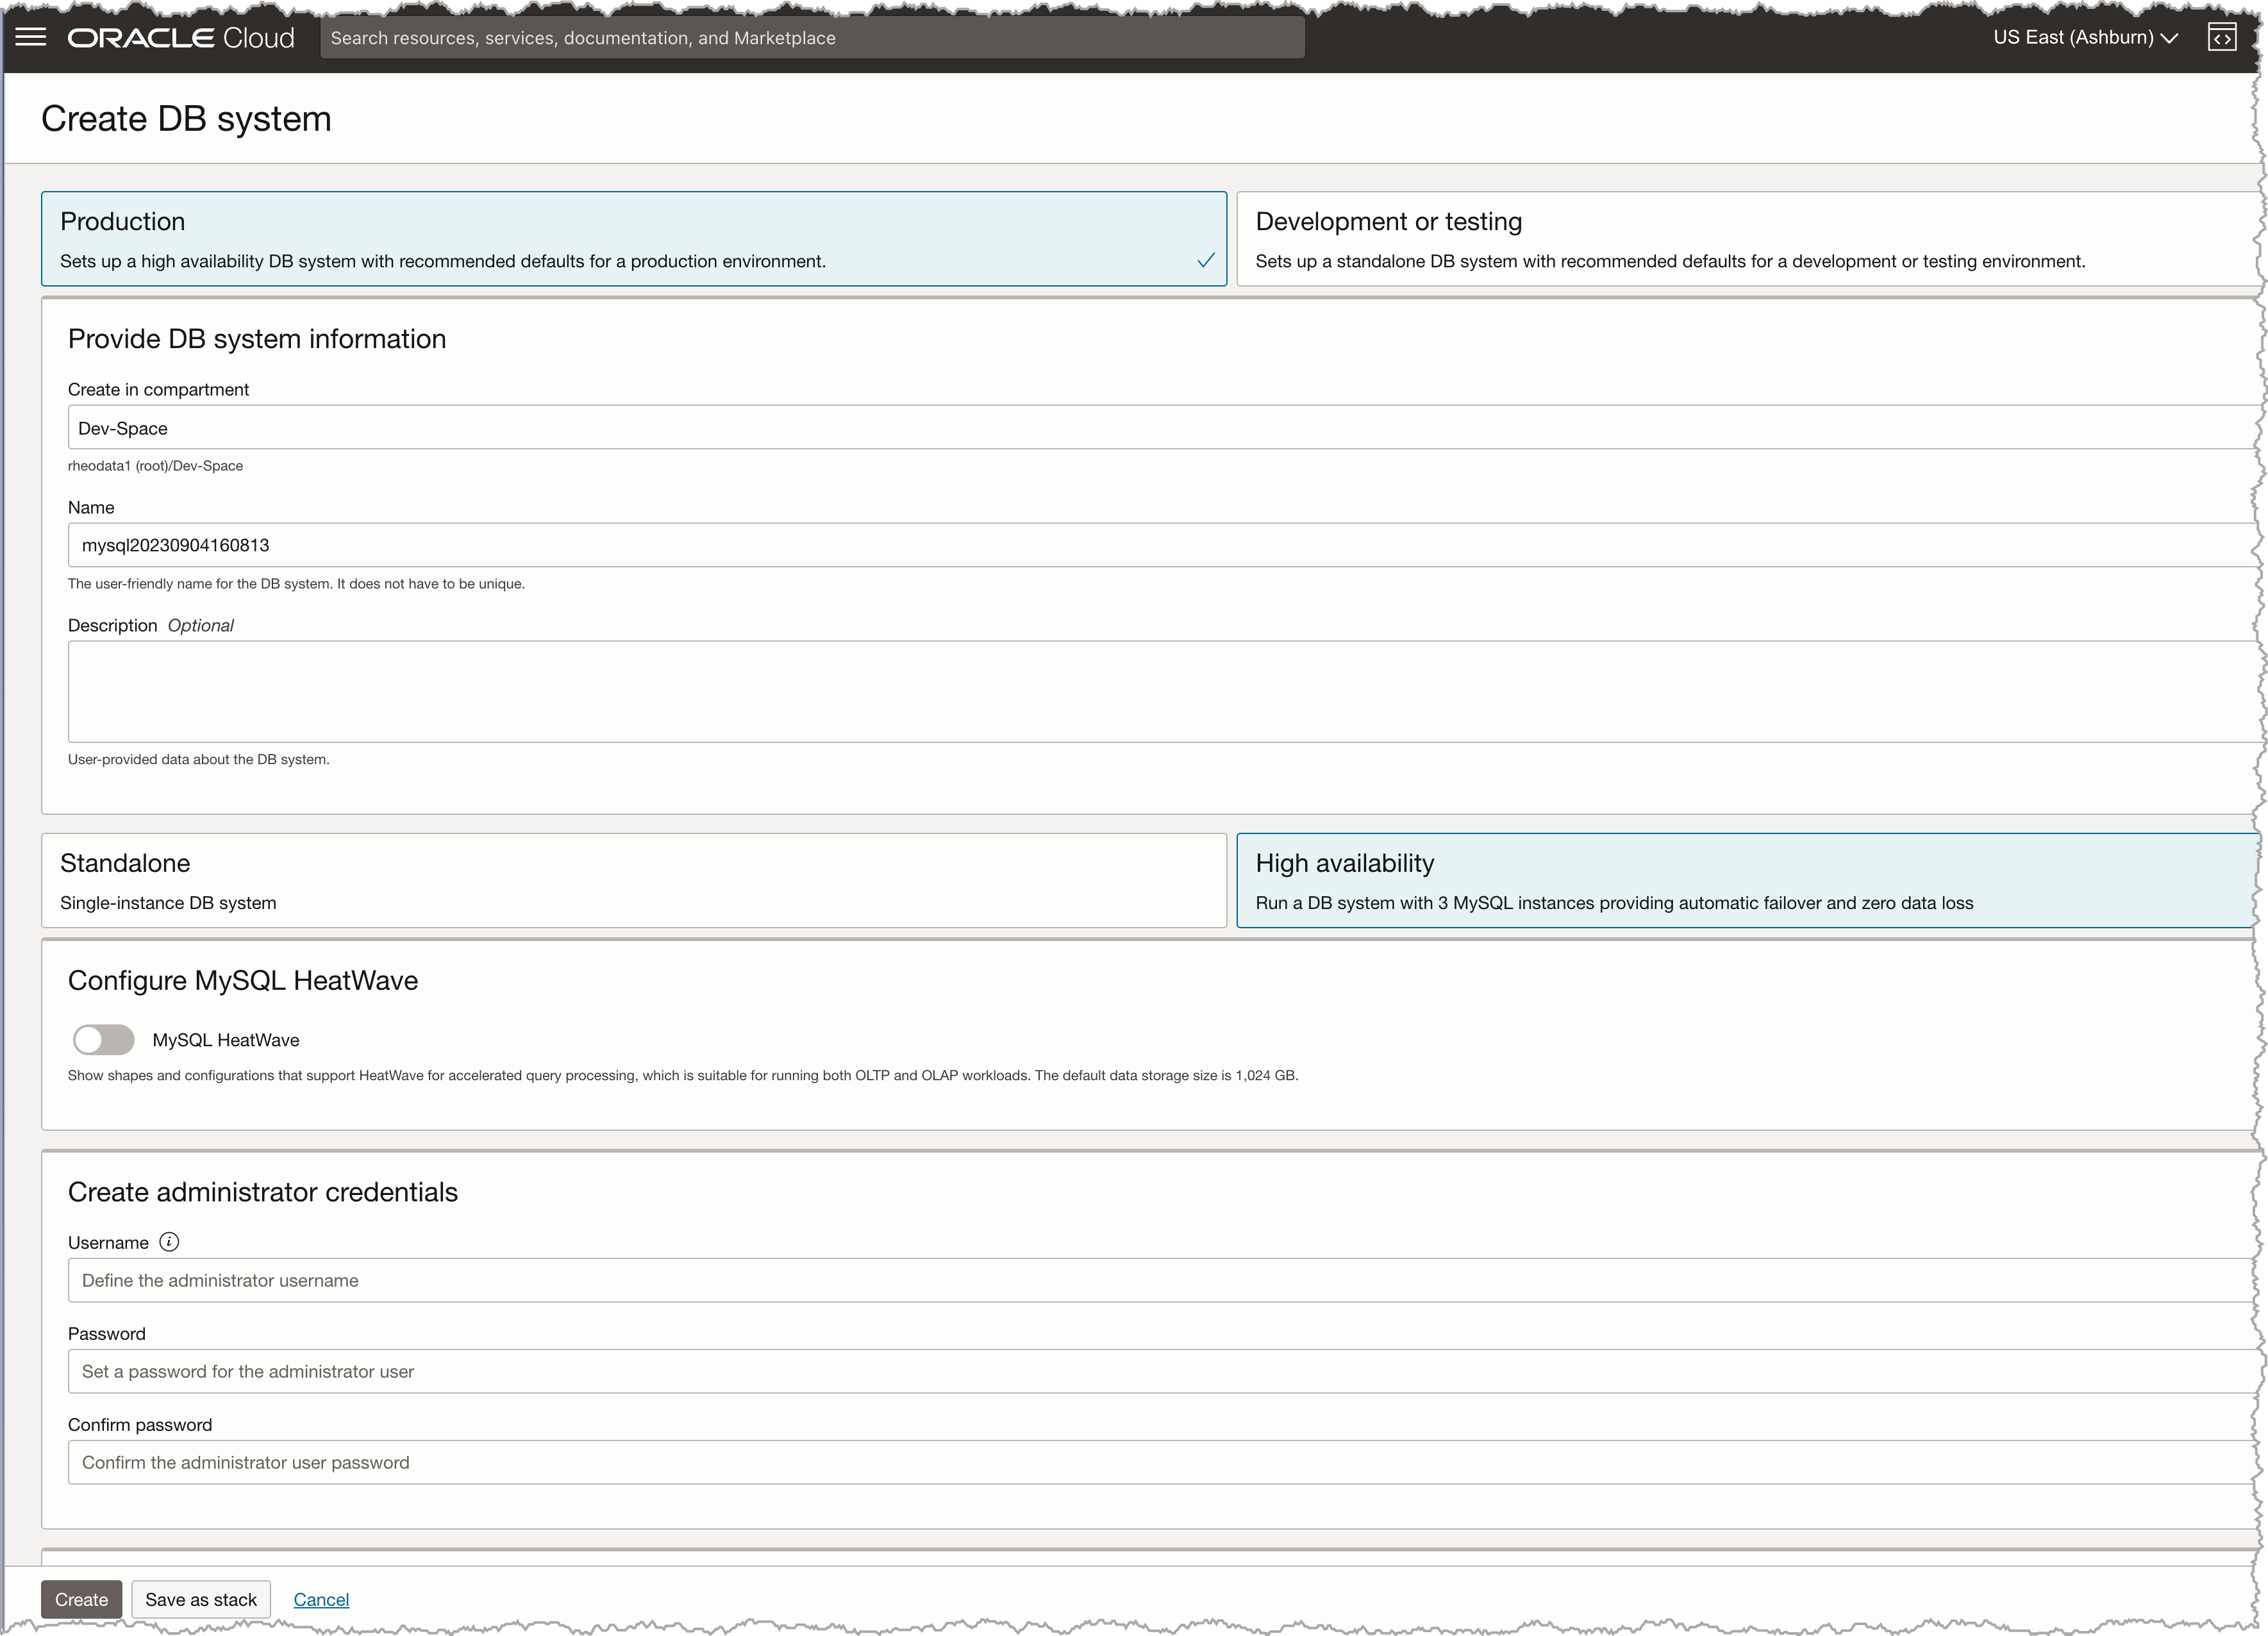
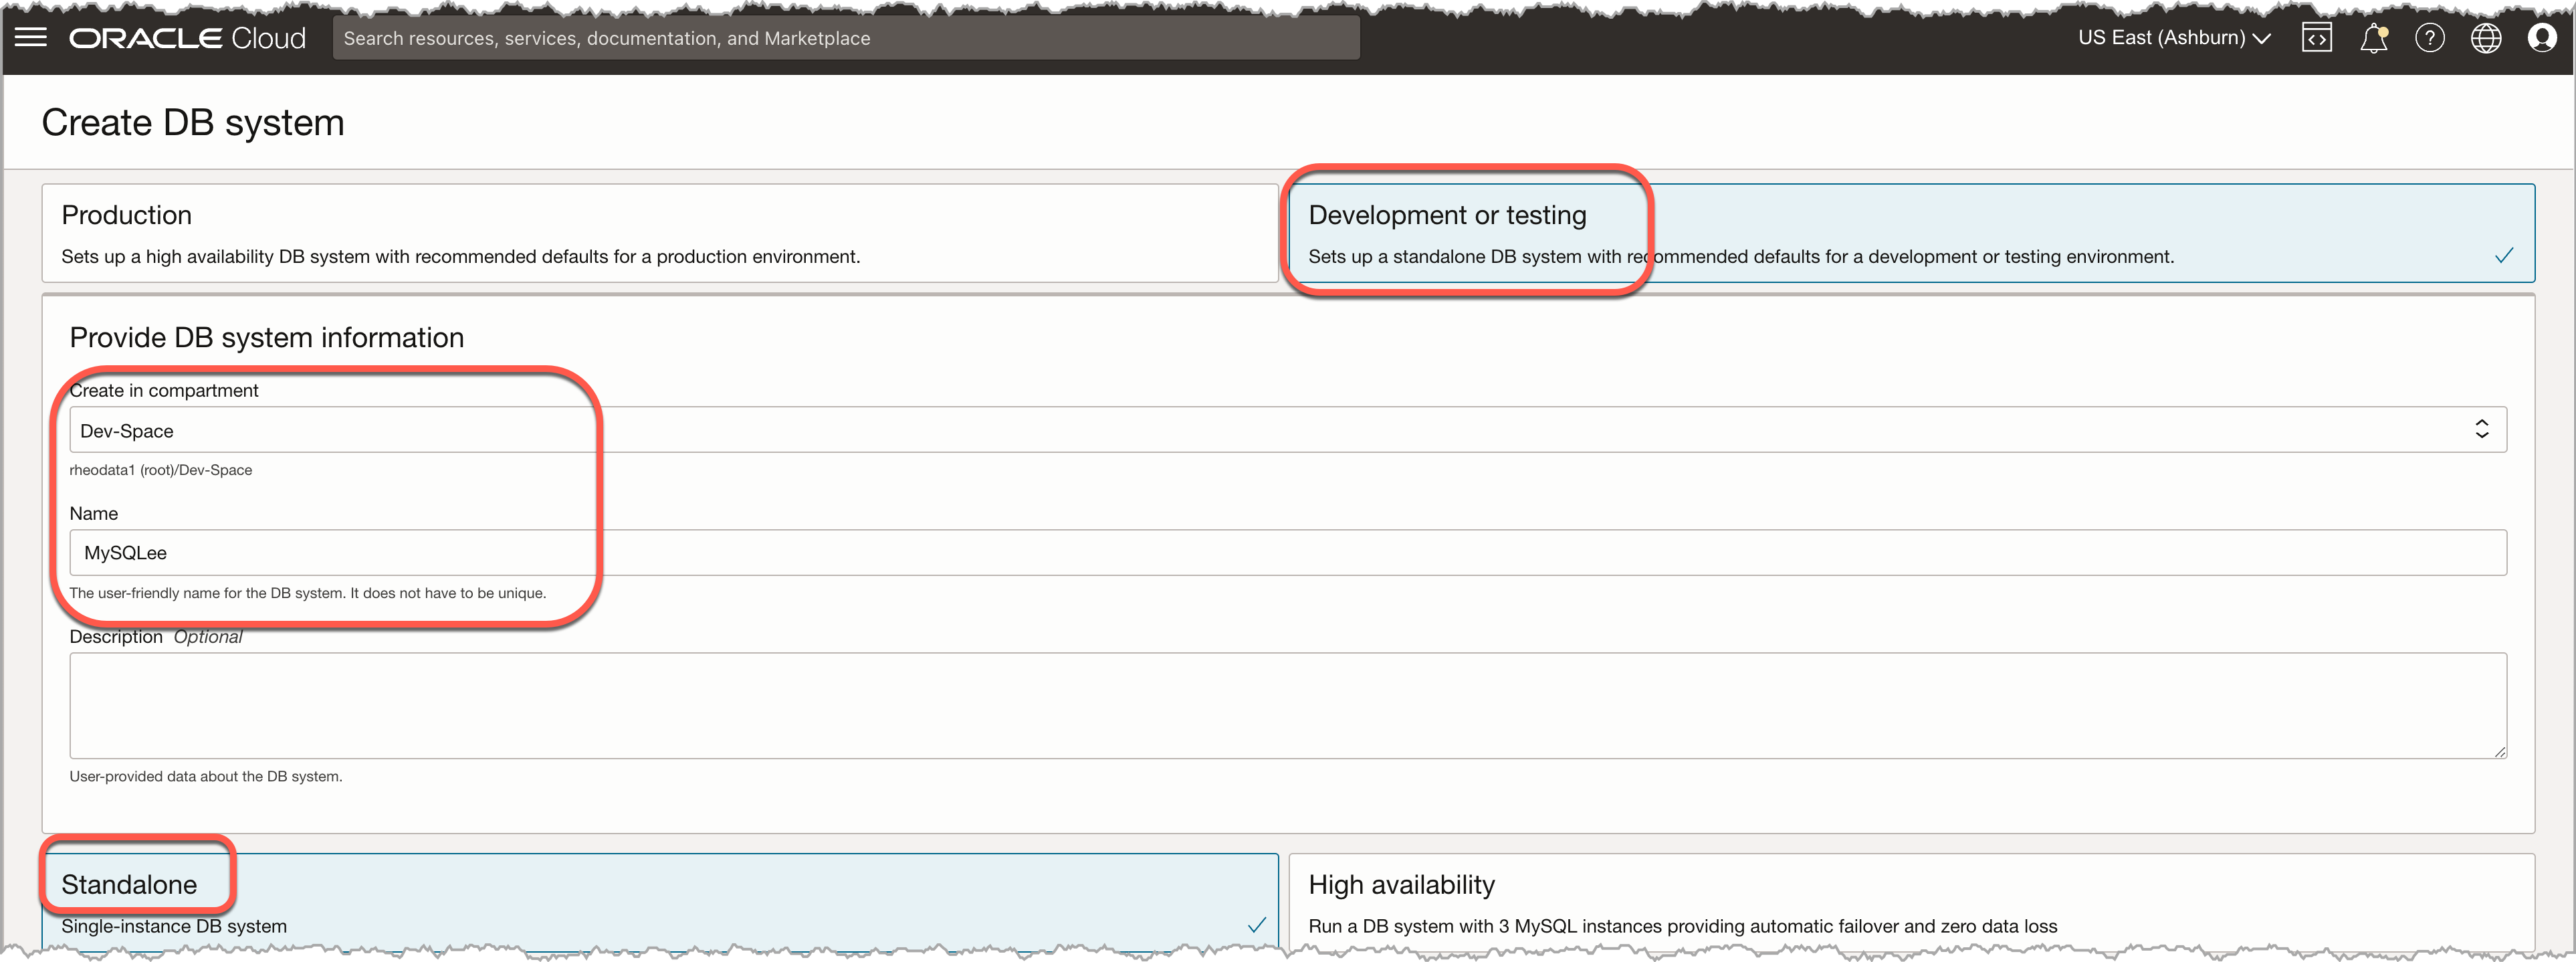
The “Create Database System” page, has a lot of items already pre-configured for us; however, we are going to change these settings to reflect our desired MySQL setup. With this being a development environment, we change from Production to Development or Testing at the top of the screen. This change forces the build to be a Standalone build. The next items we need to provide are the setting where the database is to be built – Compartment and Name that will be displayed in OCI. The description is optional.
With the understanding that we are building a Standalone MySQL system, we have the option to toggle on Heatwave or not. What this toggle does is show the OCI compute shapes that support Heatwave and allows them to be selected. There are times where you may want to have a normal MySQL instance and keeping this setting off is approerate. In our case, we are going to play with Heatwave at somepoint, enabling this is a good idea.

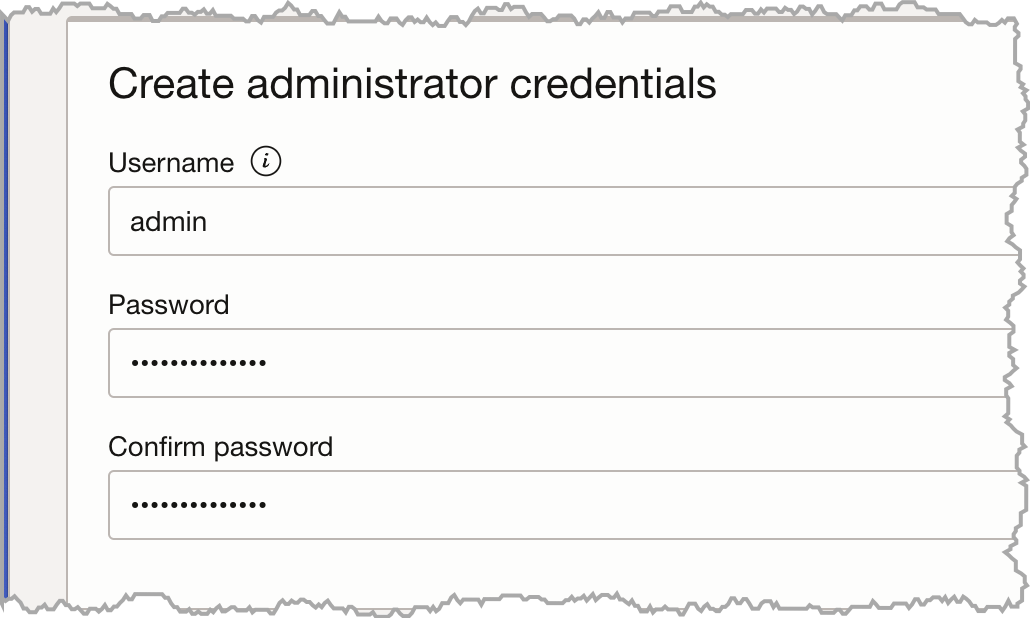
Up to this point, we only have selected or entered items that we deem needed. The next section is critical in nature because it will set the administrator username and password for the instance. Like any good dba, we need to create an admin user called “admin”. Then provide the password that will be used.
The next two sections is where we will define what network will be used, the subnet, and the availability and fault domains to be assigned. Since we already have a VNC established in another compartment, we will use that VNC and subnet. Then we are going to put this MySQL database in the availability domain – AD-1. After selecting the availability domain, we get the option to via checkbox to select the fault domain. We are not going to selected and let Oracle decide for us.

The next section is where we can configure the hardware that will be used for the MySQL databases. The Configure Hardware section is pre-selected with an shape that is configured for MySQL Heatwave. This means the compute instance will have 16 OPCU and a minimum of 512GB of memory with a network speed of 16Gbps. The data storage that is assigned is defaulted to 1024GB (1TB) of space. Since this is a test instance, we can reduce this down to 256GB or any other setting that is desired.

The final section of the Create DB System page is to define a backup stratgy for this instance. The Configure backup plan is pre-populated for you with a retention period of seven days with point-in-time recovery enabled. With this being a development system, we can turn this off for now. Simply uncheck the Enable automatic backups checkbox.

At this point, we can check the “Create” button at the bottom of the screen and the database will be built for us and the page changes back to the DB Systems Detail page. From here we can see that the database is being built.
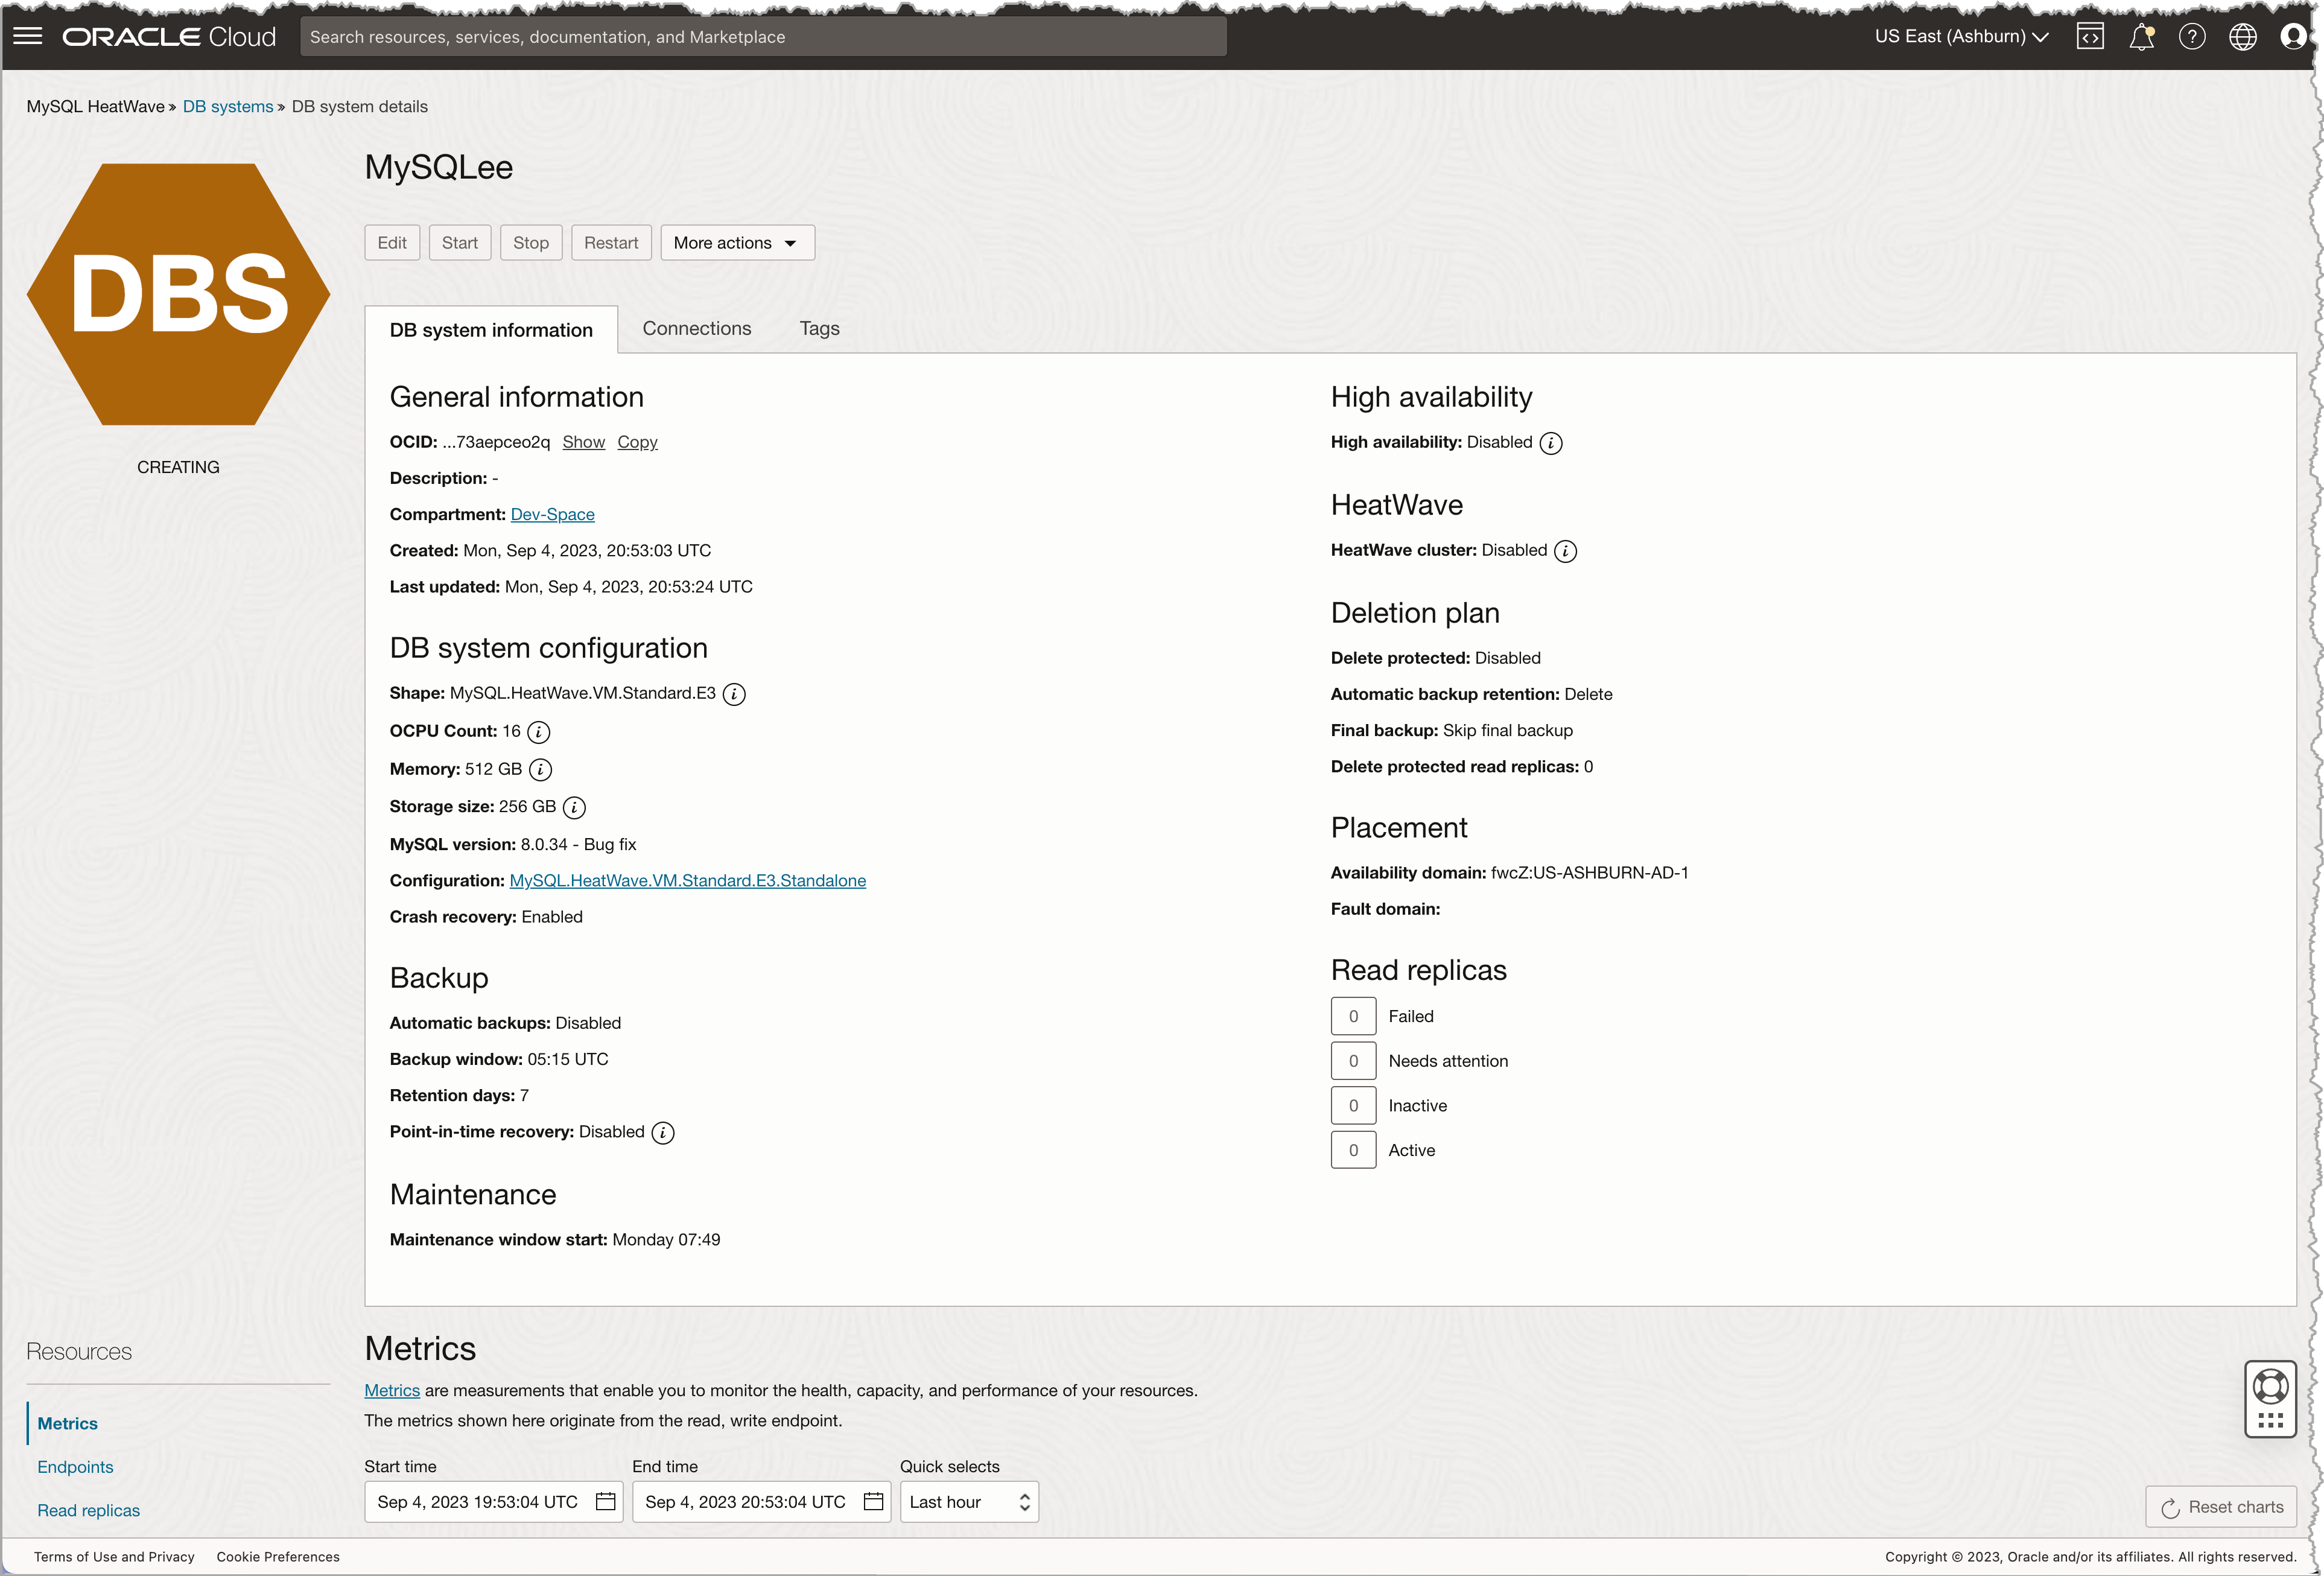
With the MySQL Database built, we can specific information on the instance from the DB Systems Page. We can also check on the progress of the build by looking under Resources -> Work requests. This gives us an idea on how long it will take to build our MySQL Heatwave Instance.

With the MySQL Heatwave Instance built, the DB Systems Detail page returns a green status and we can now review the system. Notice that there is a Connections tab to the right of DB System Information. Under this tab, we will find the IP address for connections; however, we can only make a connection to a private IP address. This means, we have to define a bastion host or compute instance with a public IP to make the connection to this database (more on this shortly).
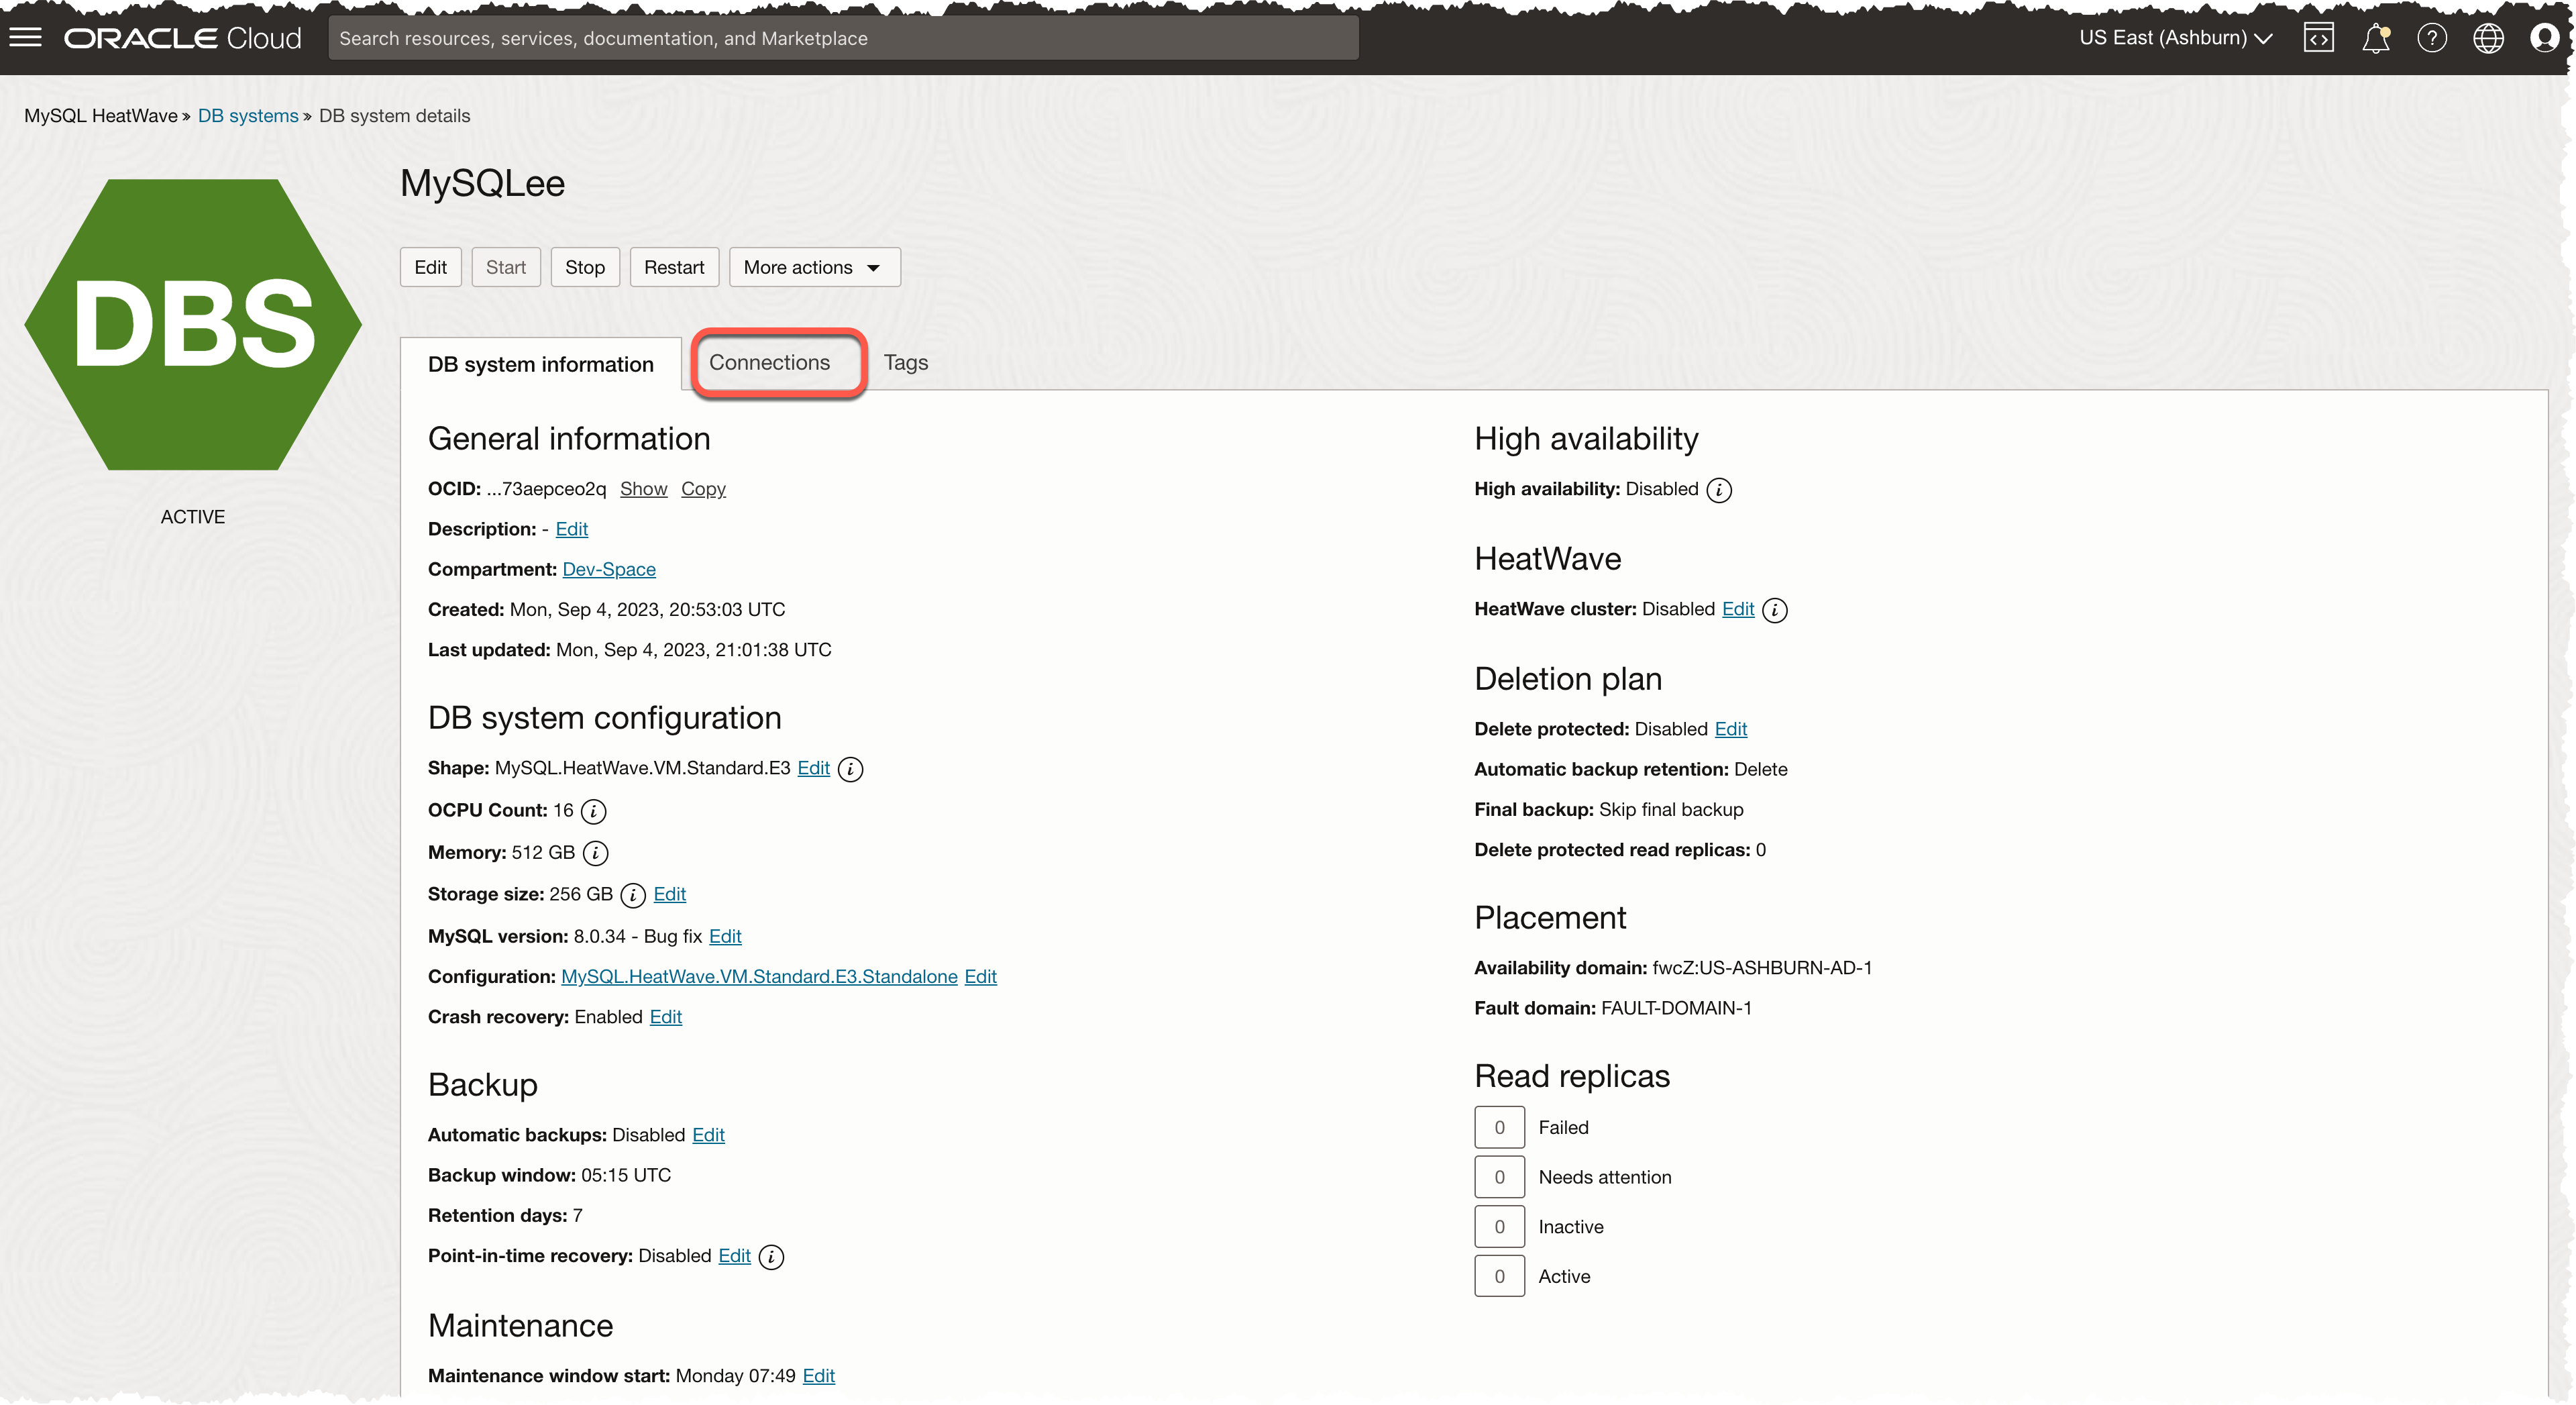

At this point, we have a functioning MySQL Heatwave system that can be accessed.
Bobby Curtis

I’m Bobby Curtis and I’m just your normal average guy who has been working in the technology field for awhile (started when I was 18 with the US Army). The goal of this blog has changed a bit over the years. Initially, it was a general blog where I wrote thoughts down. Then it changed to focus on the Oracle Database, Oracle Enterprise Manager, and eventually Oracle GoldenGate.
If you want to follow me on a more timely manner, I can be followed on twitter at @dbasolved or on LinkedIn under “Bobby Curtis MBA”.
