Configuring Nginx on AWS EC2 for Oracle GoldenGate 21c
When installed, Oracle GoldenGat (Microservices) will set up “services” that require a port number for access. For the first run of the Oracle GoldenGate Configuration Assistant (OGGCA), the assistant will create the ServiceManager (1 port) and the first deployment (5 ports). That means six ports would need to be opened on a firewall to run a single Oracle GoldenGate (Microservices) deployment. This only increases by five ports for each deployment built under a single ServiceManager.
To address this, an open-source solution called NGINX allows all the ports within the deployment to be consolidated to a single port. The single port that can be used with NGINX is either 80 (HTTP) or 443 (HTTPS); which will enable Oracle GoldenGate (Microservices) to be used over a standard firewall port
Downloading Binaries
The NGINX binaries need to be downloaded regardless of where you install Oracle GoldenGate (Microservices). For Oracle Enterprise Linux, I documented the process here. When you start to expand the installation base for Microservices, the installation of NGINX becomes similar yet different.
To install NGINX on an Amazon Web Services (AWS) EC2 instance, the following steps should be followed. For more details, you can also reference this blog post on installing Nginx -> here or here.
1. SSH into the AWS EC2 instance
$ ssh -I ~/.ssh/rd-usf-tst.pem ec2-user@<public-ip-address>
2. Sudo to Root
$ sudo su –
3. Use Amazon Extras to install NGINX
$ amazon-linux-extras install nginx1.12
4. Confirm installation
$ yum list install nginx
After installing the NGINX on the AWS EC2 instance, the next thing that must be done is to configure it against the Oracle GoldenGate (Microservices) environment.
Configure NGINX
Oracle has made it easy for Oracle GoldenGate administrators to configure the NGINX interface after the installation. They provided a script called “ReverseProxySettings” in the $OGG_HOME/lib/utl directory. This script is used to build the Nginx configuration file based on the deployments running on the AWS EC2 node.
The steps to configure the reverse proxy are as follows:
1. Change to the Reverse Proxy directory under $OGG_HOME
$ cd $OGG_HOME/lib/utl/reverseproxy
2. Run ReverseProxySettings with options (unsecure access)
$ ./ReverseProxySettings -u oggadmin -P <password> -o ogg.conf http://localhost:<servicemanager_port>
3. Copy the config file to the NGINX directory
$ sudo cp ogg.conf /etc/nginx/conf.d/nginx.conf
4. Create a dummy cert
$ sudo sh /etc/ssl/certs/make-dummy-cert /etc/nginx/ogg.pem
5. Start NGINX
$ sudo nginx &
6. Test/validate NGINX config
$ sudo nginx -t
7. Reload NGINX
$ sudo nginx -s reload
8. Access the ServiceManager and other services without port numbers
Note: The ogg.pem must be downloaded and uploaded to your local cert wallet to access via a web browser.
End Result
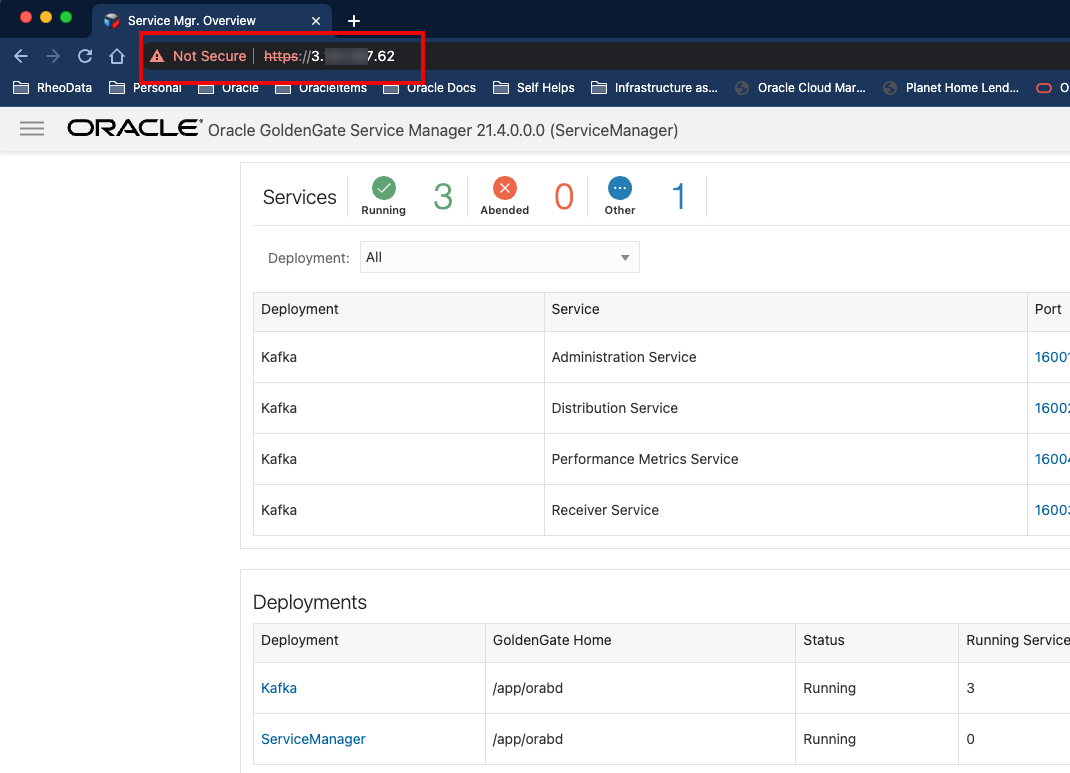
Once everything with the NGINX is configured, Oracle GoldenGate (Microservices) can be accessed by URL using the standard port of 80 (HTTP) or 443 (HTTPS). This enables Oracle GoldenGate (Microservices) environments to be accessed over standard firewall rules.

Bobby Curtis

I’m Bobby Curtis and I’m just your normal average guy who has been working in the technology field for awhile (started when I was 18 with the US Army). The goal of this blog has changed a bit over the years. Initially, it was a general blog where I wrote thoughts down. Then it changed to focus on the Oracle Database, Oracle Enterprise Manager, and eventually Oracle GoldenGate.
If you want to follow me on a more timely manner, I can be followed on twitter at @dbasolved or on LinkedIn under “Bobby Curtis MBA”.
